Setup Guide
Add comments to your website in 5 minutes
This guide walks you through integrating Talky into your website. No technical experience required—just follow each step and you'll be up and running.
What You'll Need
- A Google account (for authentication)
- Access to edit your website's HTML
- 5 minutes of your time
Step 1: Create Your Account
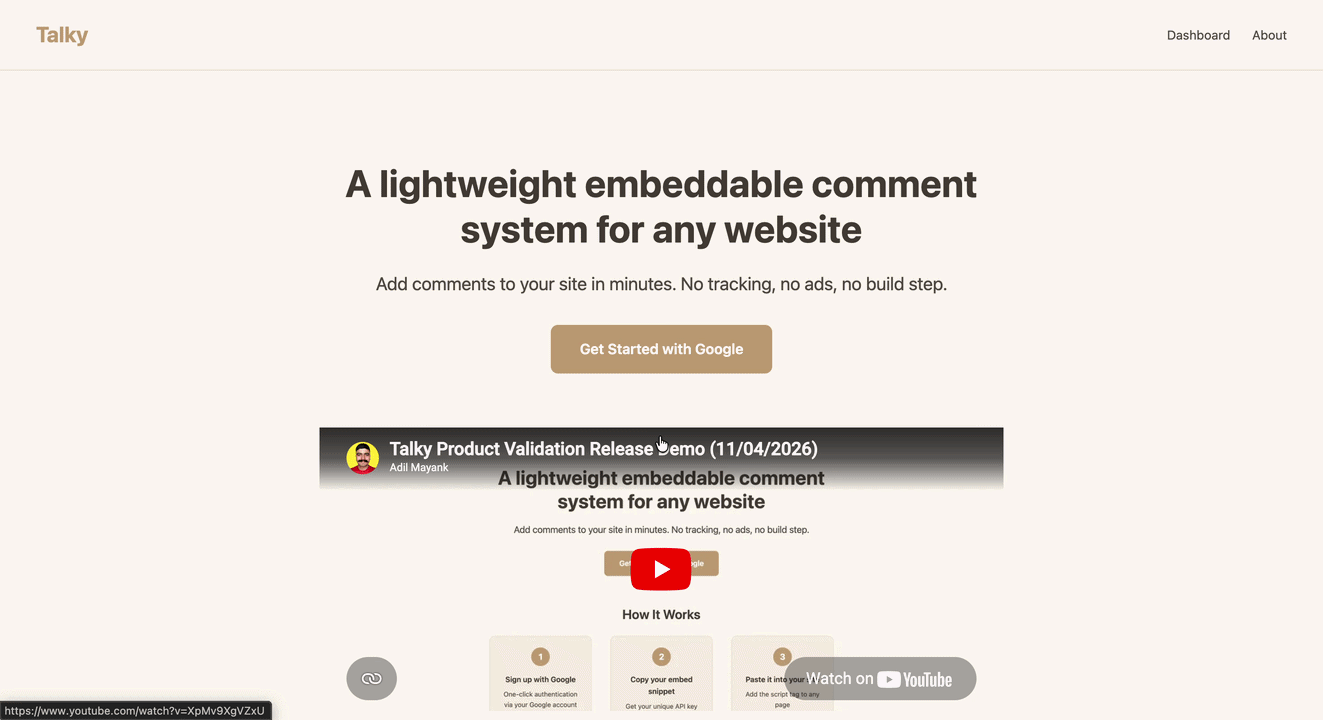
Go to talky.adilmayank.com and click "Get Started with Google".
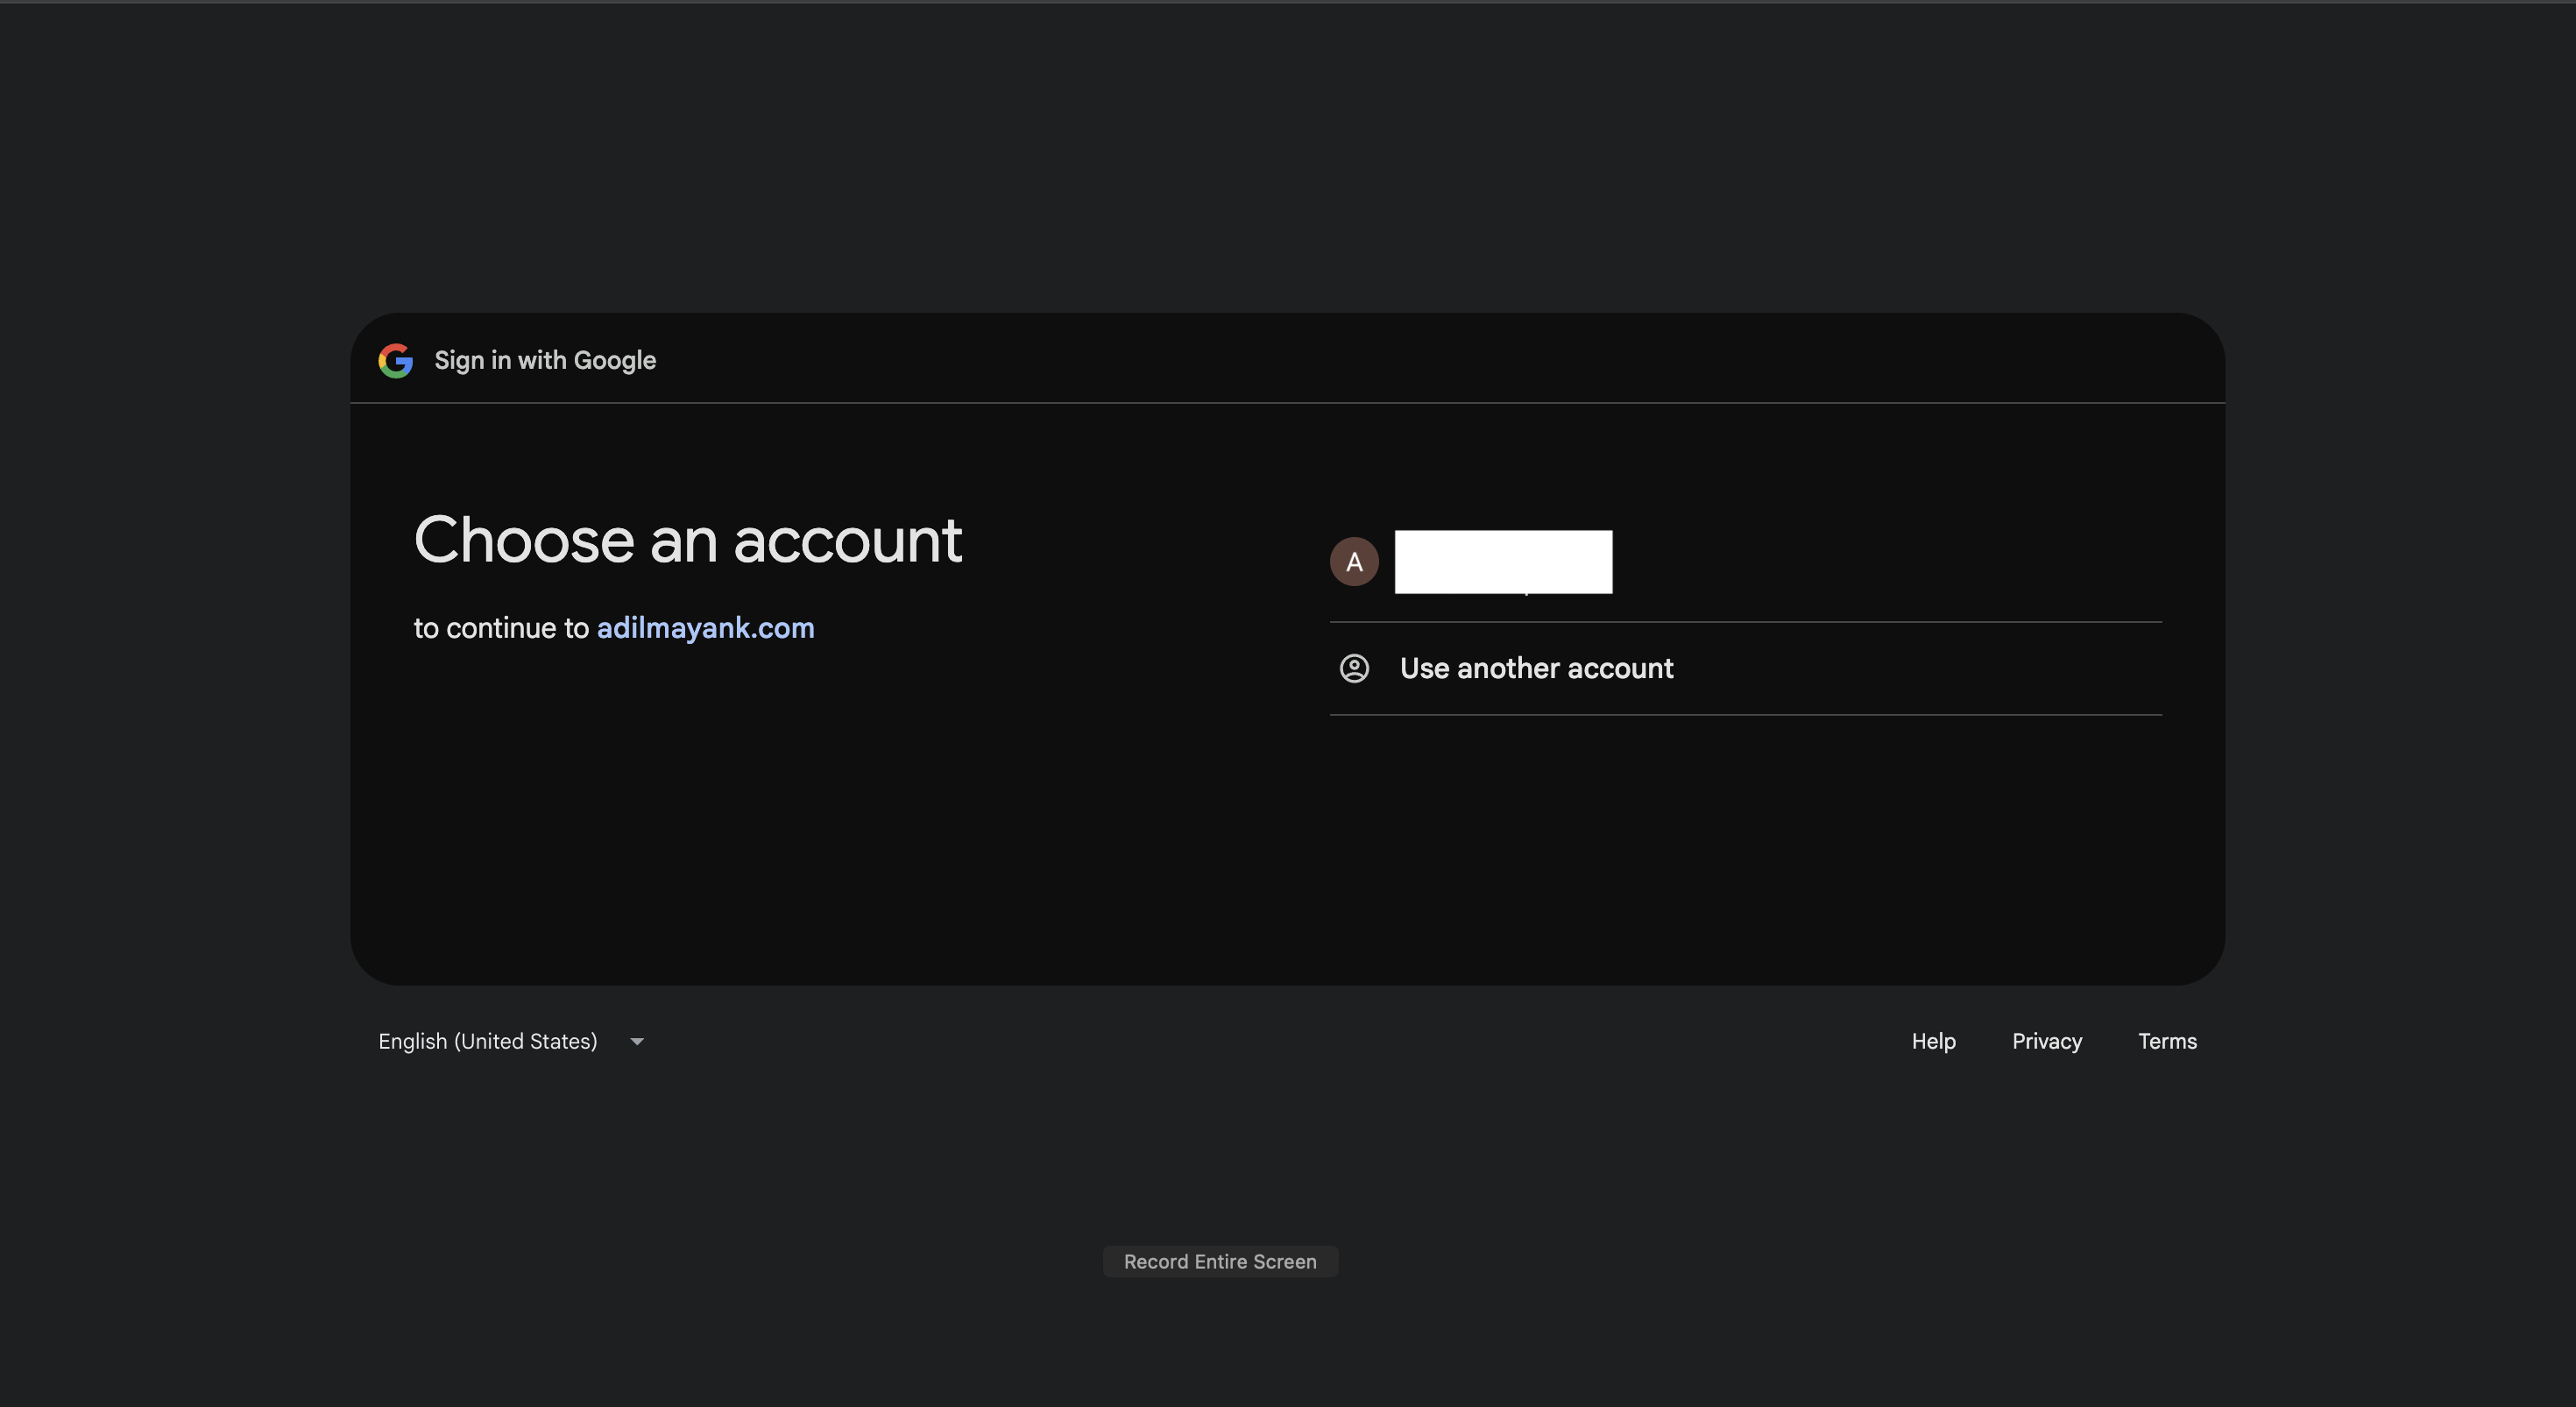
You'll be redirected to Google. Select your account to continue.
Click "Continue" to allow Talky to access your email for authentication.
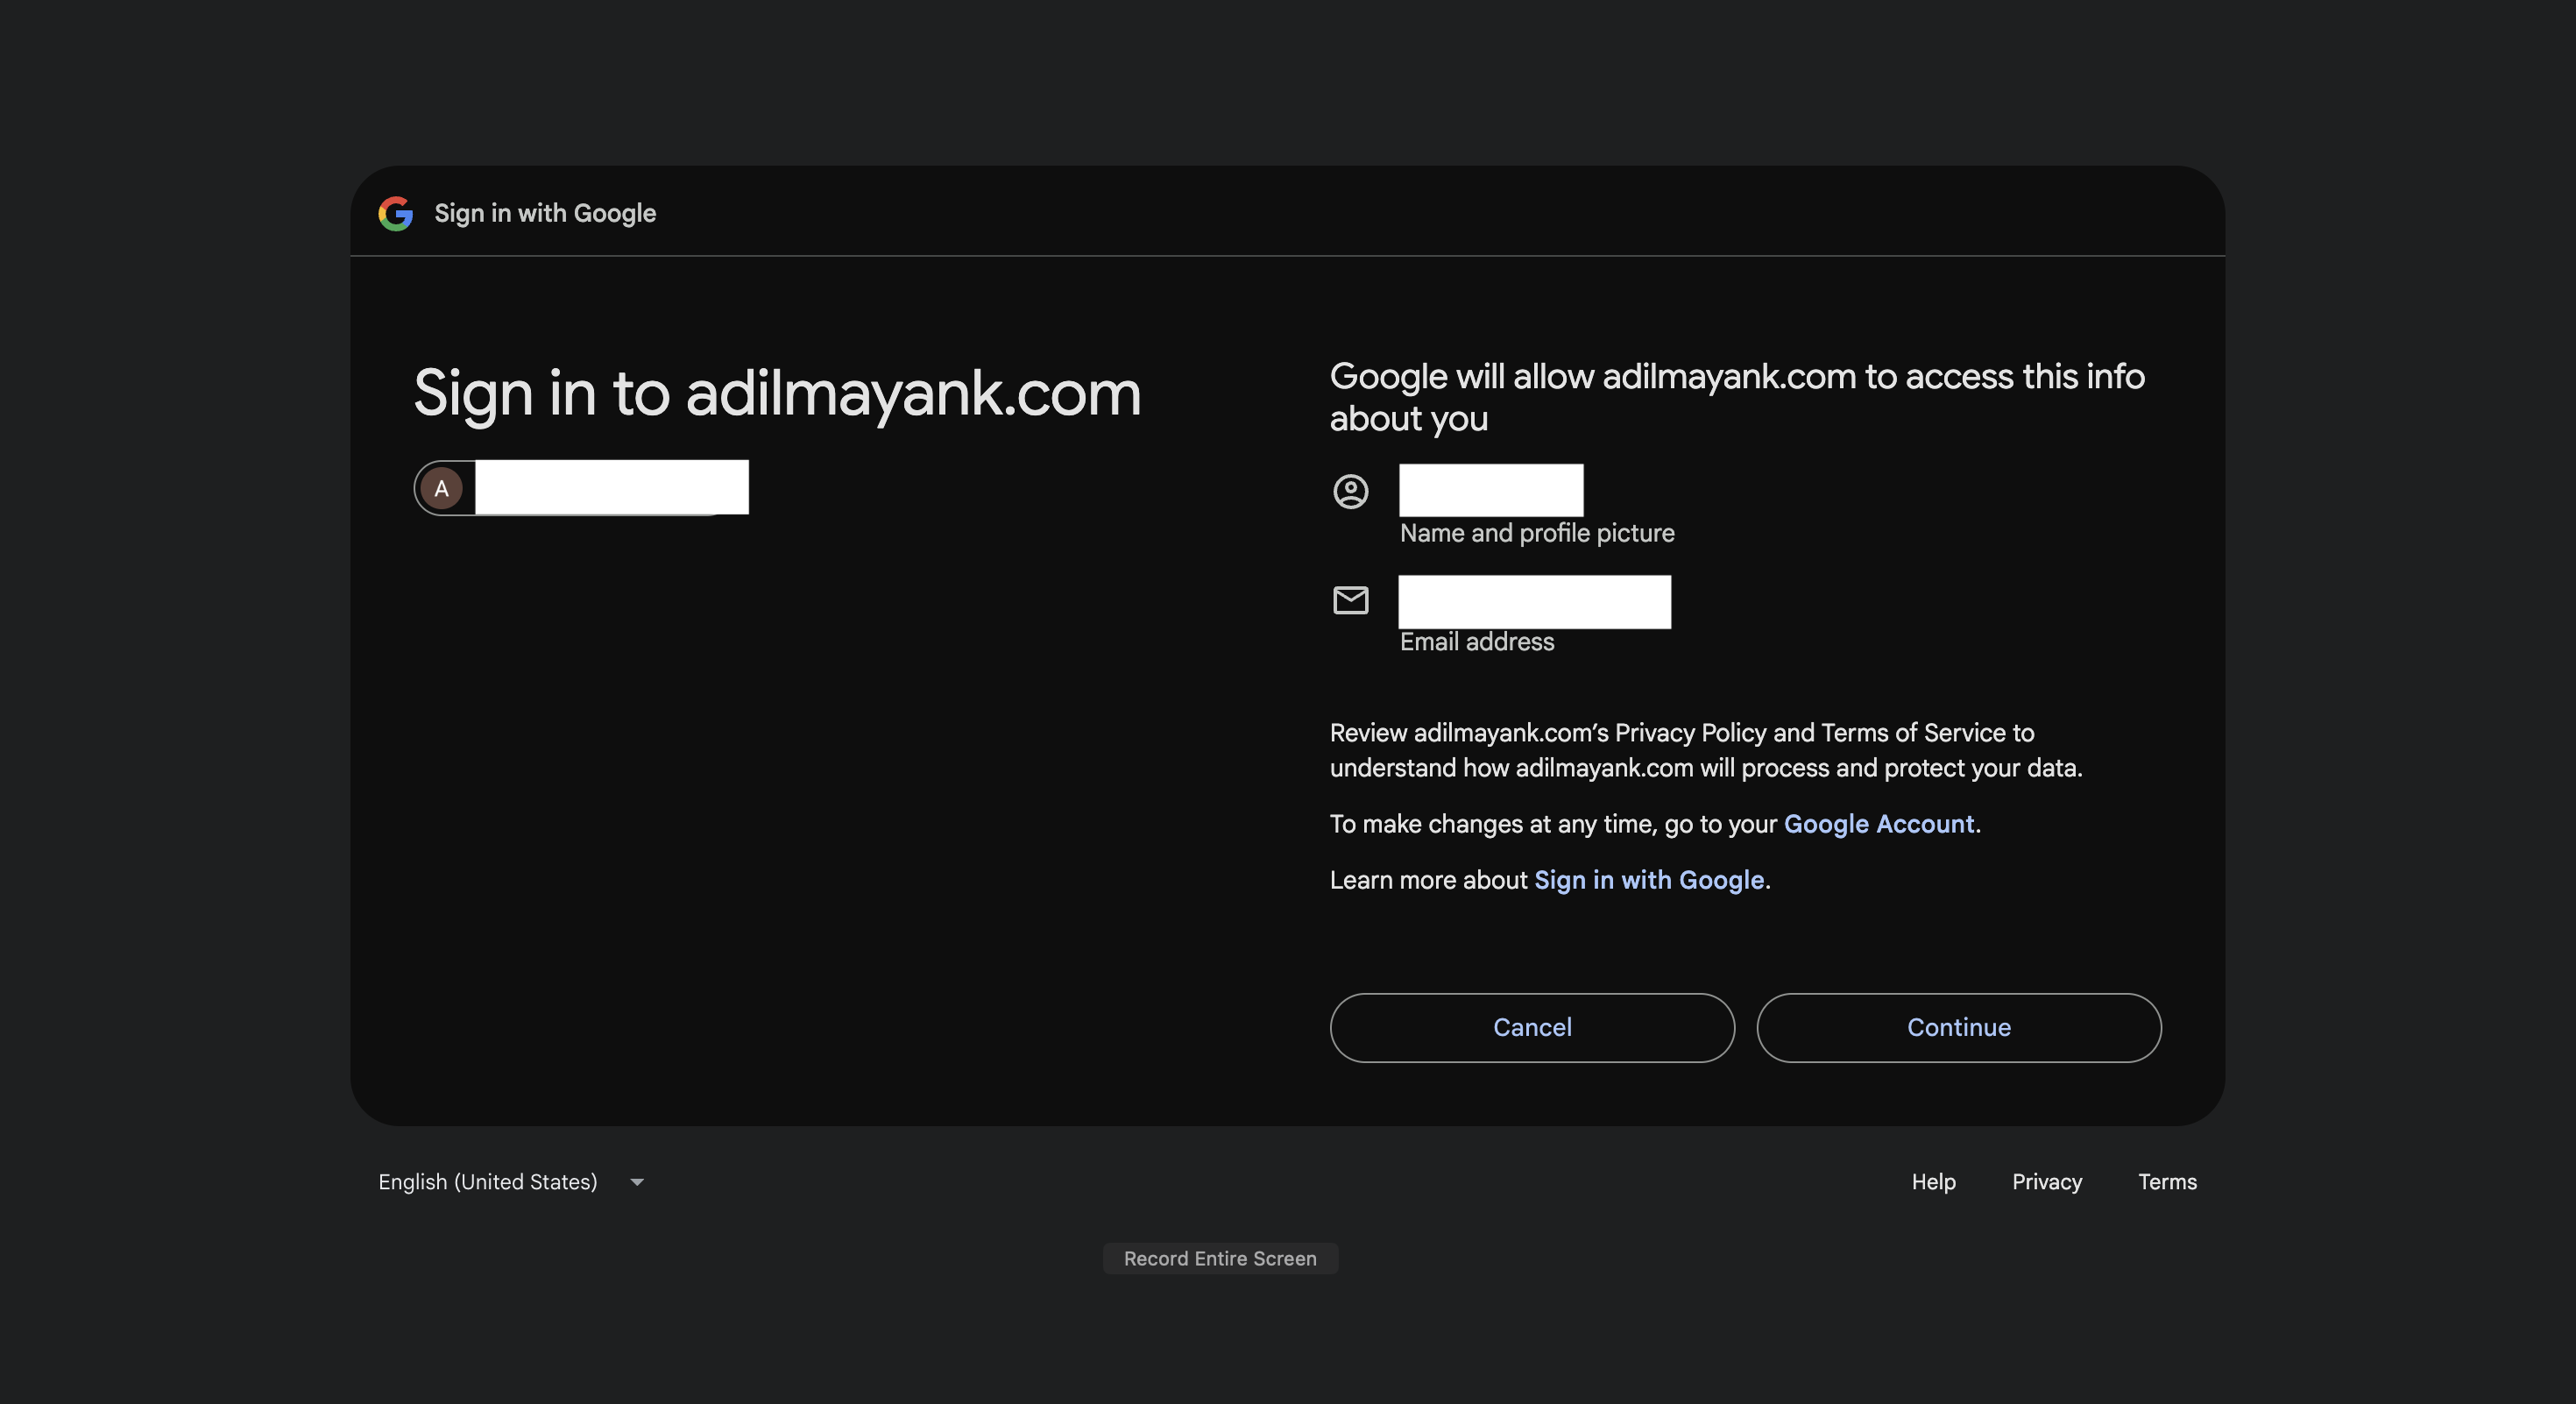
Talky only accesses your email to create your account. We never share your data with third parties.
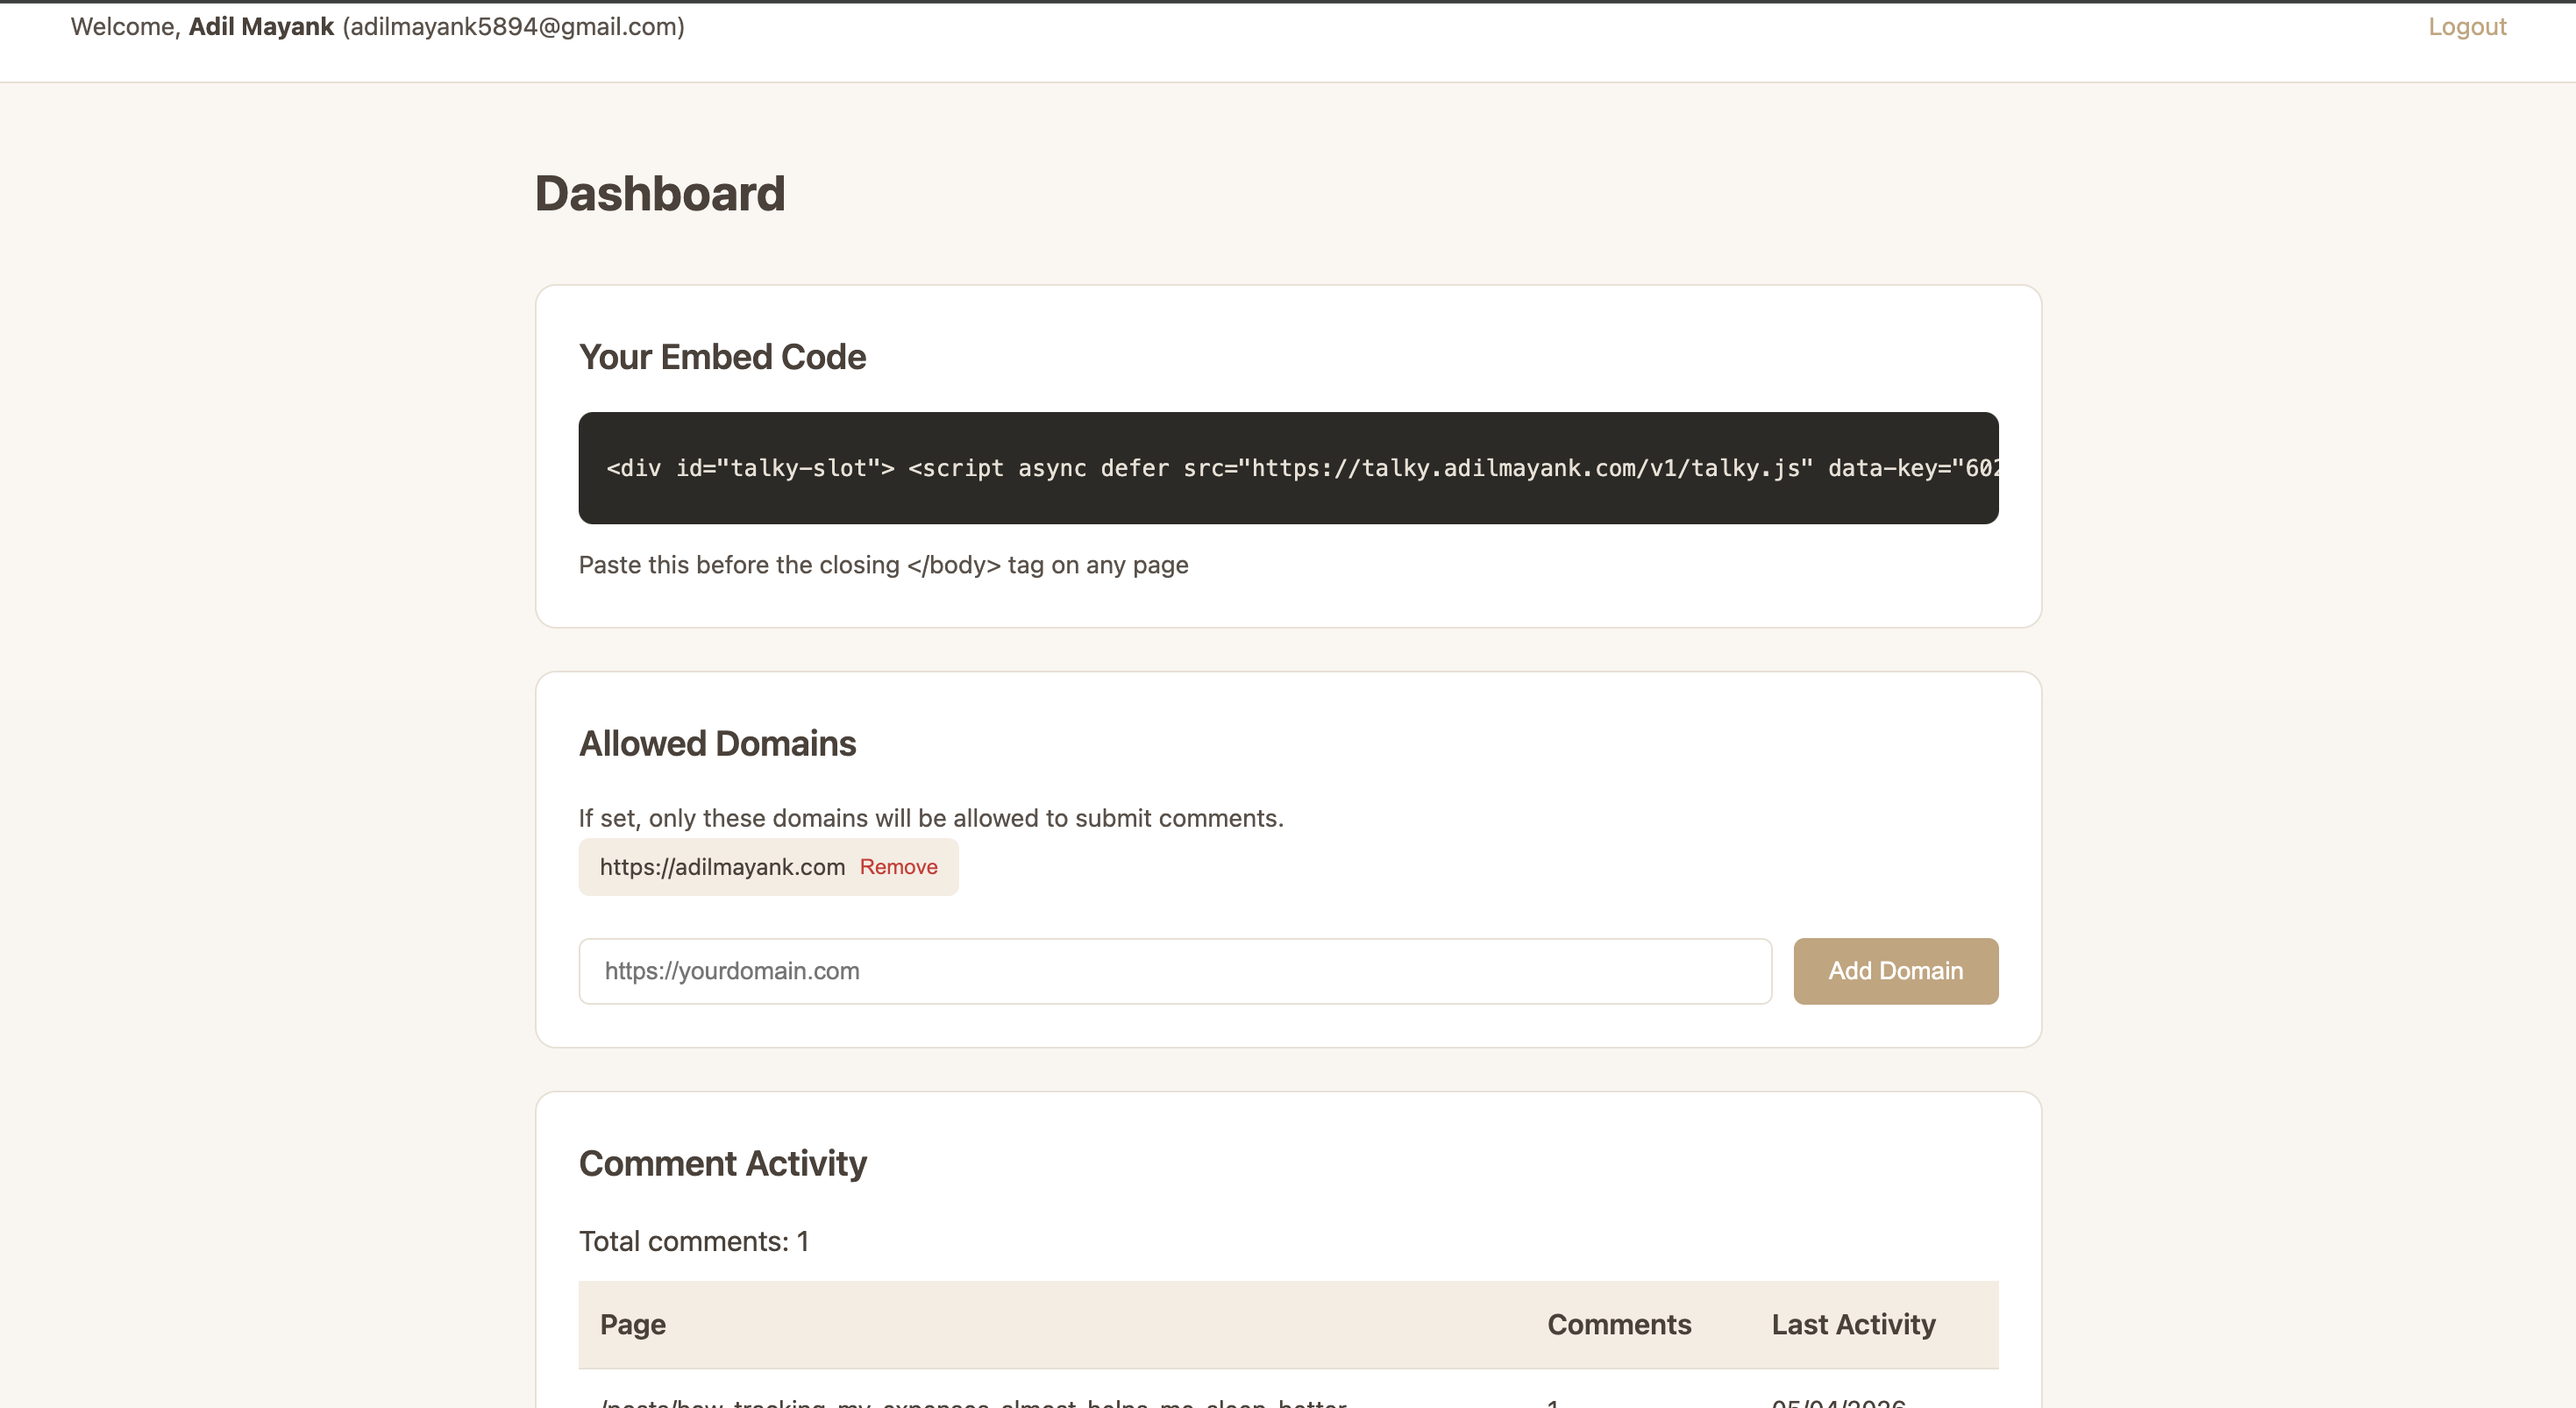
Step 2: Get Your API Key
After signing in, you'll be taken to your dashboard. This is where you manage your API key.
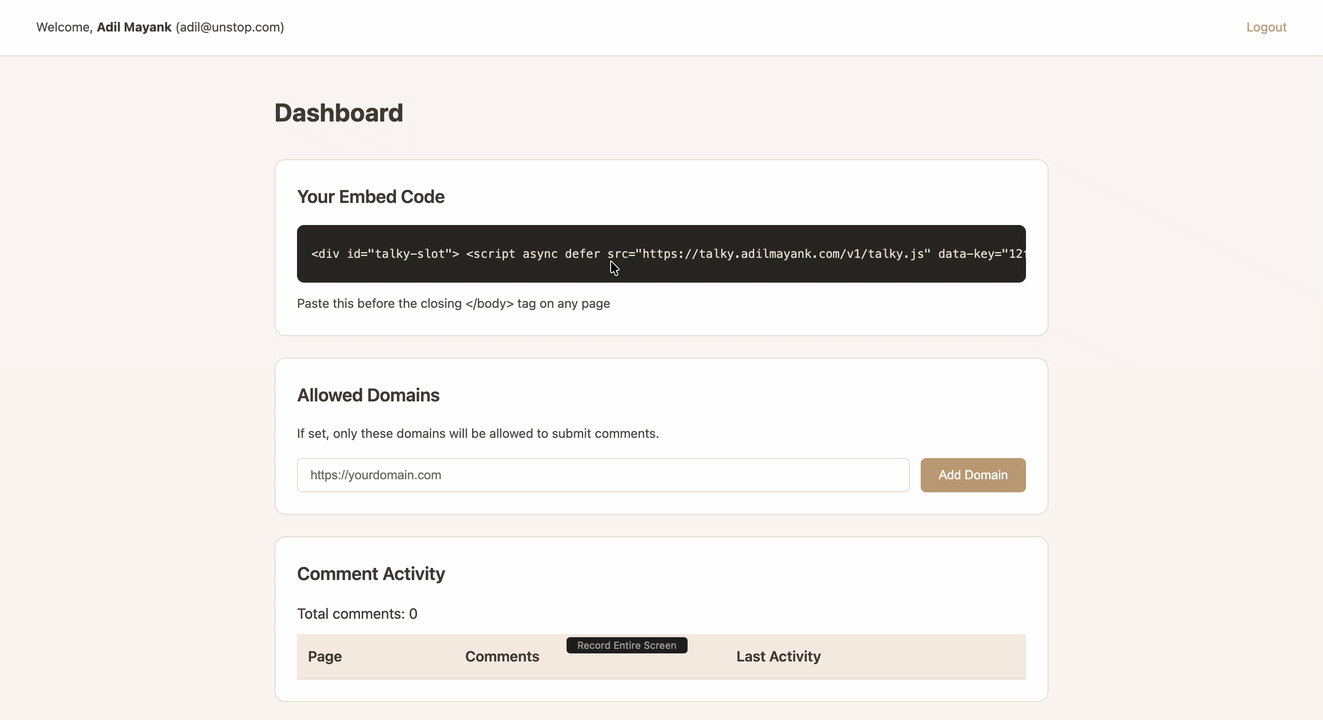
Click the copy button next to your API key. It looks like xxxxxxxx-xxxx-xxxx-xxxx-xxxxxxxxxxxx.
Your API key is a unique identifier, not a secret. It needs to be included in your website's code to work. The security comes from domain restrictions—only your allowed domains can post comments.
Step 3: Add Talky to Your Website
Now comes the fun part—adding comments to your site. Paste this code just before the closing </body> tag of your webpage:
<!-- Paste this before </body> tag -->
<div id="talky-slot">
  <script async defer src="https://talky.adilmayank.com/v1/talky.js" data-key="YOUR_API_KEY_HERE"></script>
</div>
Replace YOUR_API_KEY_HERE with your actual API key from Step 2.
Example: Plain HTML
Here's what it looks like in a complete HTML file:
<!DOCTYPE html>
<html>
  <head>
    <title>My Blog</title>
  </head>
  <body>
    <h1>Welcome to my blog!</h1>
    <p>Thanks for visiting.</p>

    <!-- Talky Comments -->
    <div id="talky-slot">
      <script async defer src="https://talky.adilmayank.com/v1/talky.js" data-key="xxxxxxxx-xxxx-xxxx-xxxx-xxxxxxxxxxxx"></script>
    </div>

  </body>
</html>
Example: React / Next.js
Add the code in your page component (e.g., pages/index.js or app/page.tsx):
// In your component JSX/TSX
<div>
  <h1>My Blog Post</h1>
  <p>Content here...</p>

  {/* Talky Comments */}
  <div id="talky-slot">
    <script
      async
      defer
      src="https://talky.adilmayank.com/v1/talky.js"
      data-key="xxxxxxxx-xxxx-xxxx-xxxx-xxxxxxxxxxxx"
    />
  </div>
</div>
Example: WordPress
Go to Appearance → Widgets → Custom HTML and add:
<div id="talky-slot">
  <script async defer src="https://talky.adilmayank.com/v1/talky.js" data-key="xxxxxxxx-xxxx-xxxx-xxxx-xxxxxxxxxxxx"></script>
</div>
Step 4: Test It Out
Visit the page where you added Talky. You should see a comment box at the bottom.
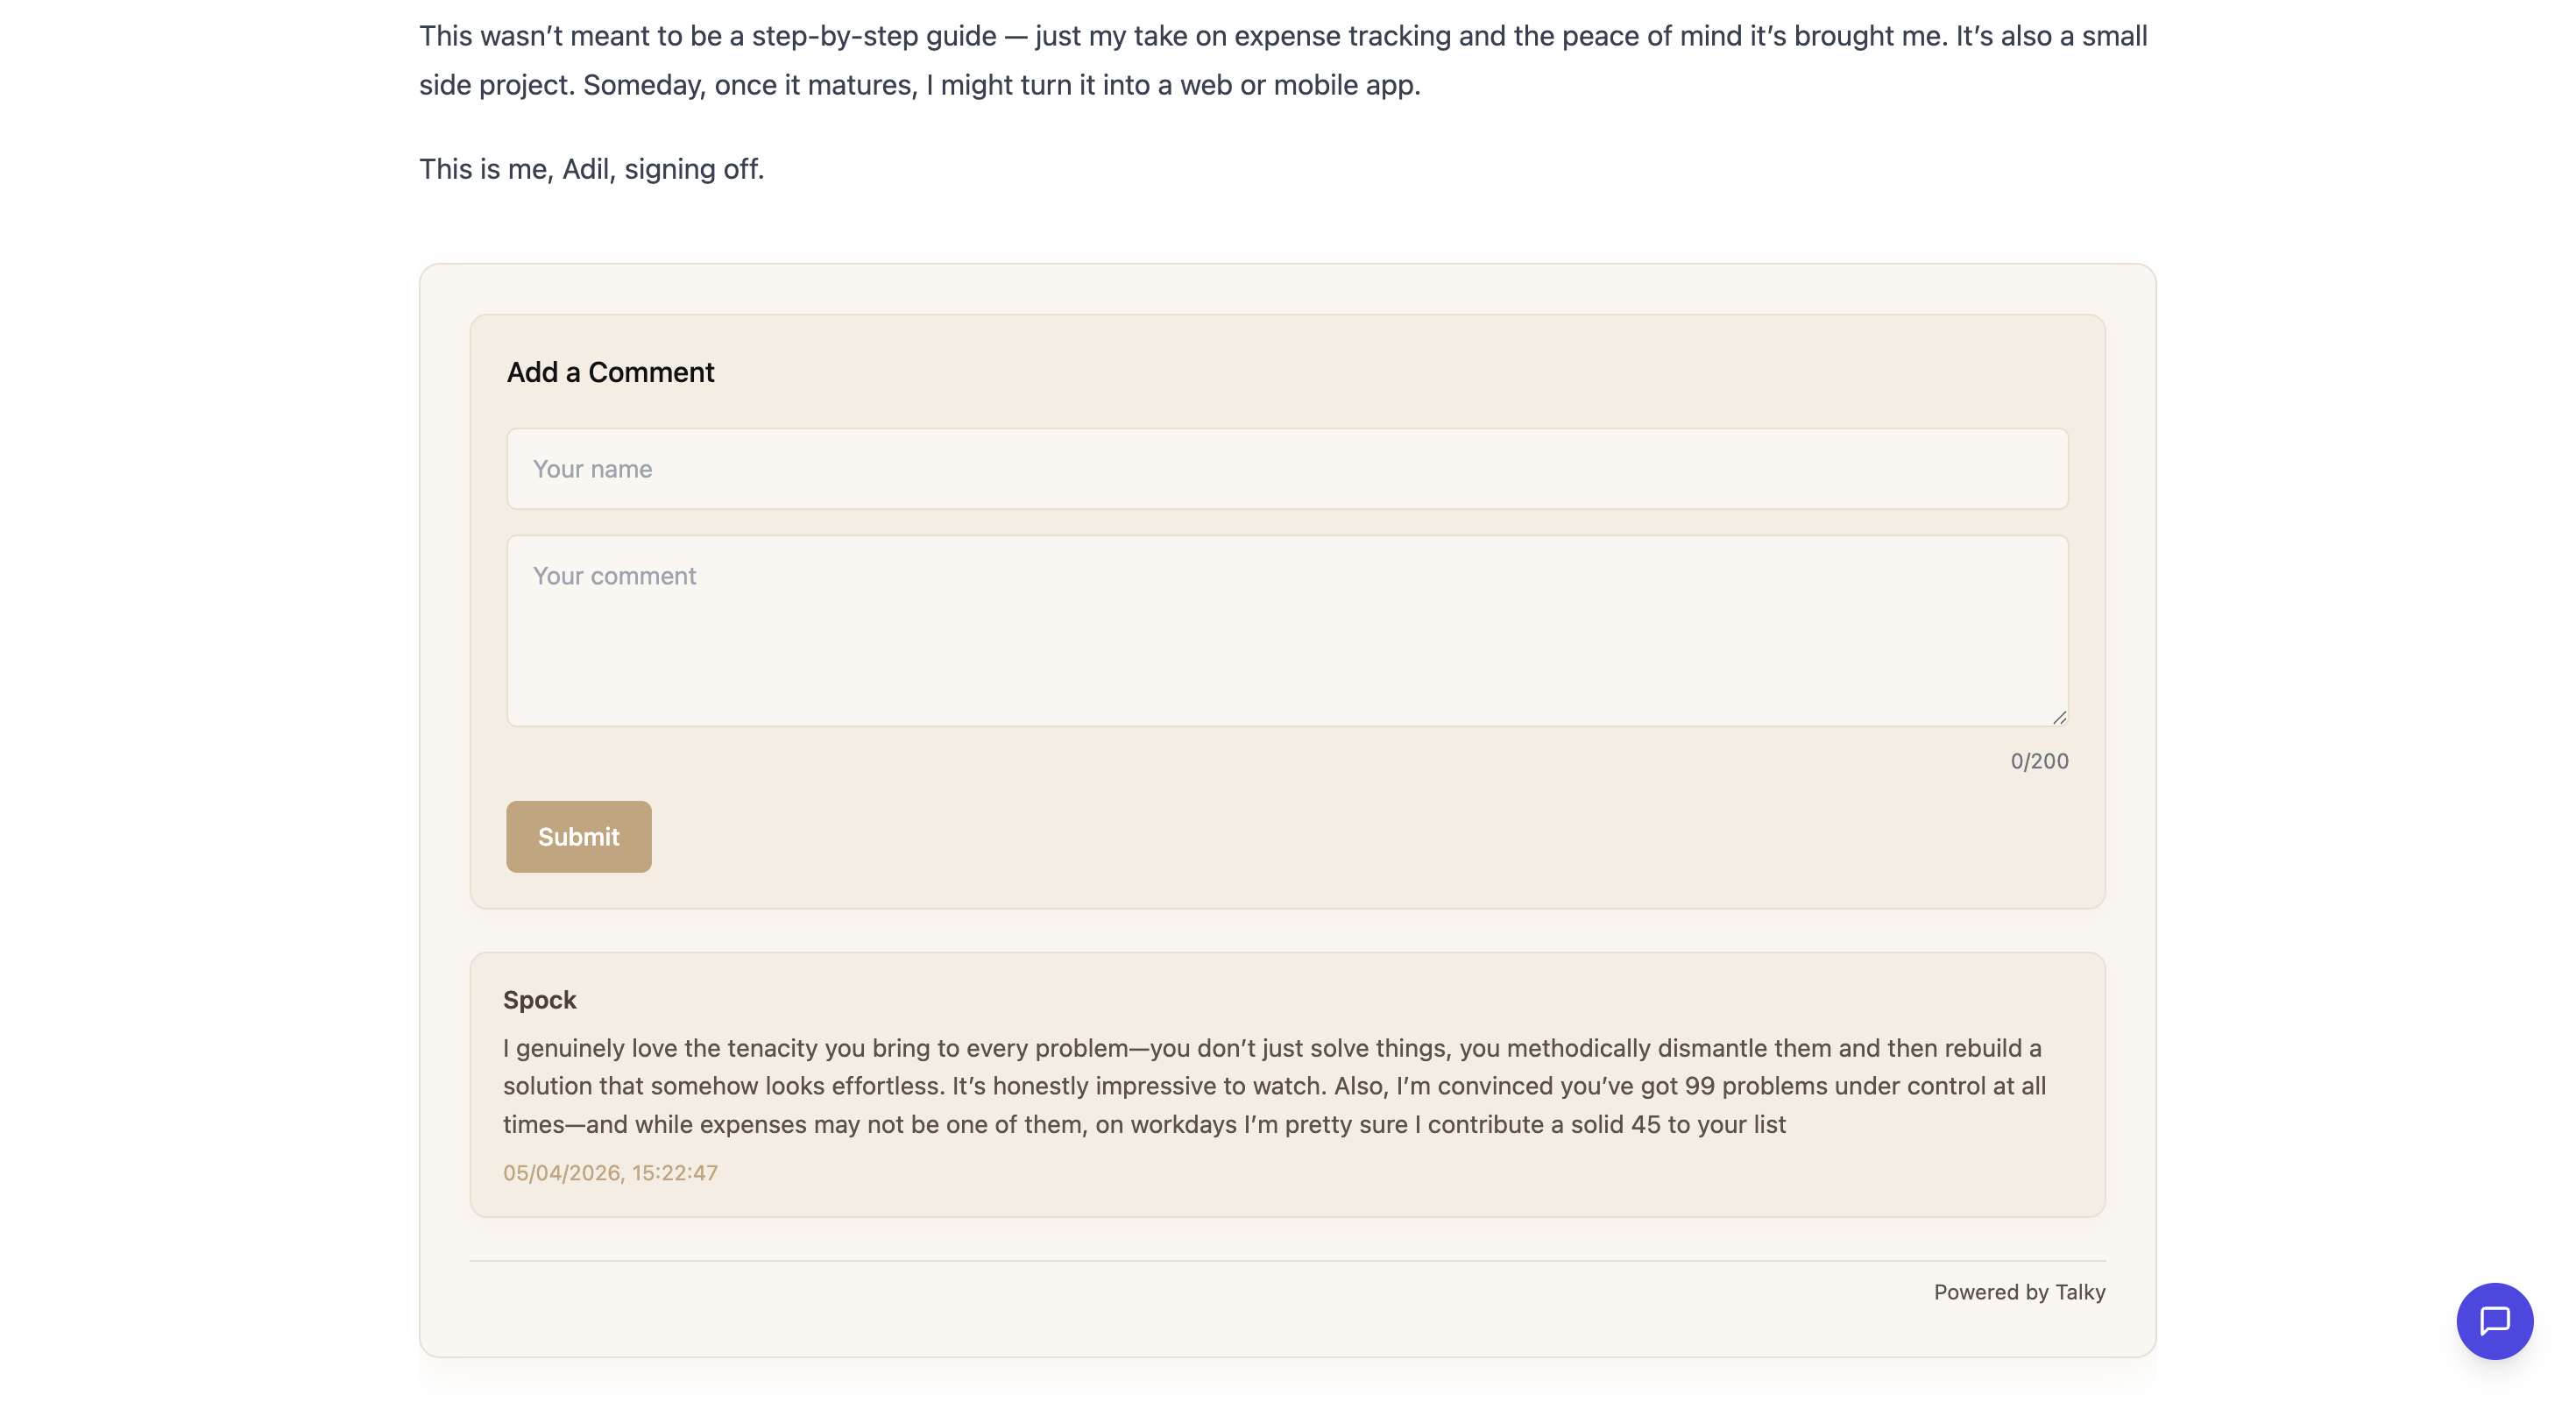
Type a message and click "Post Comment". Sign in with Google if prompted.
Go back to your Talky dashboard—you should see your test comment listed.
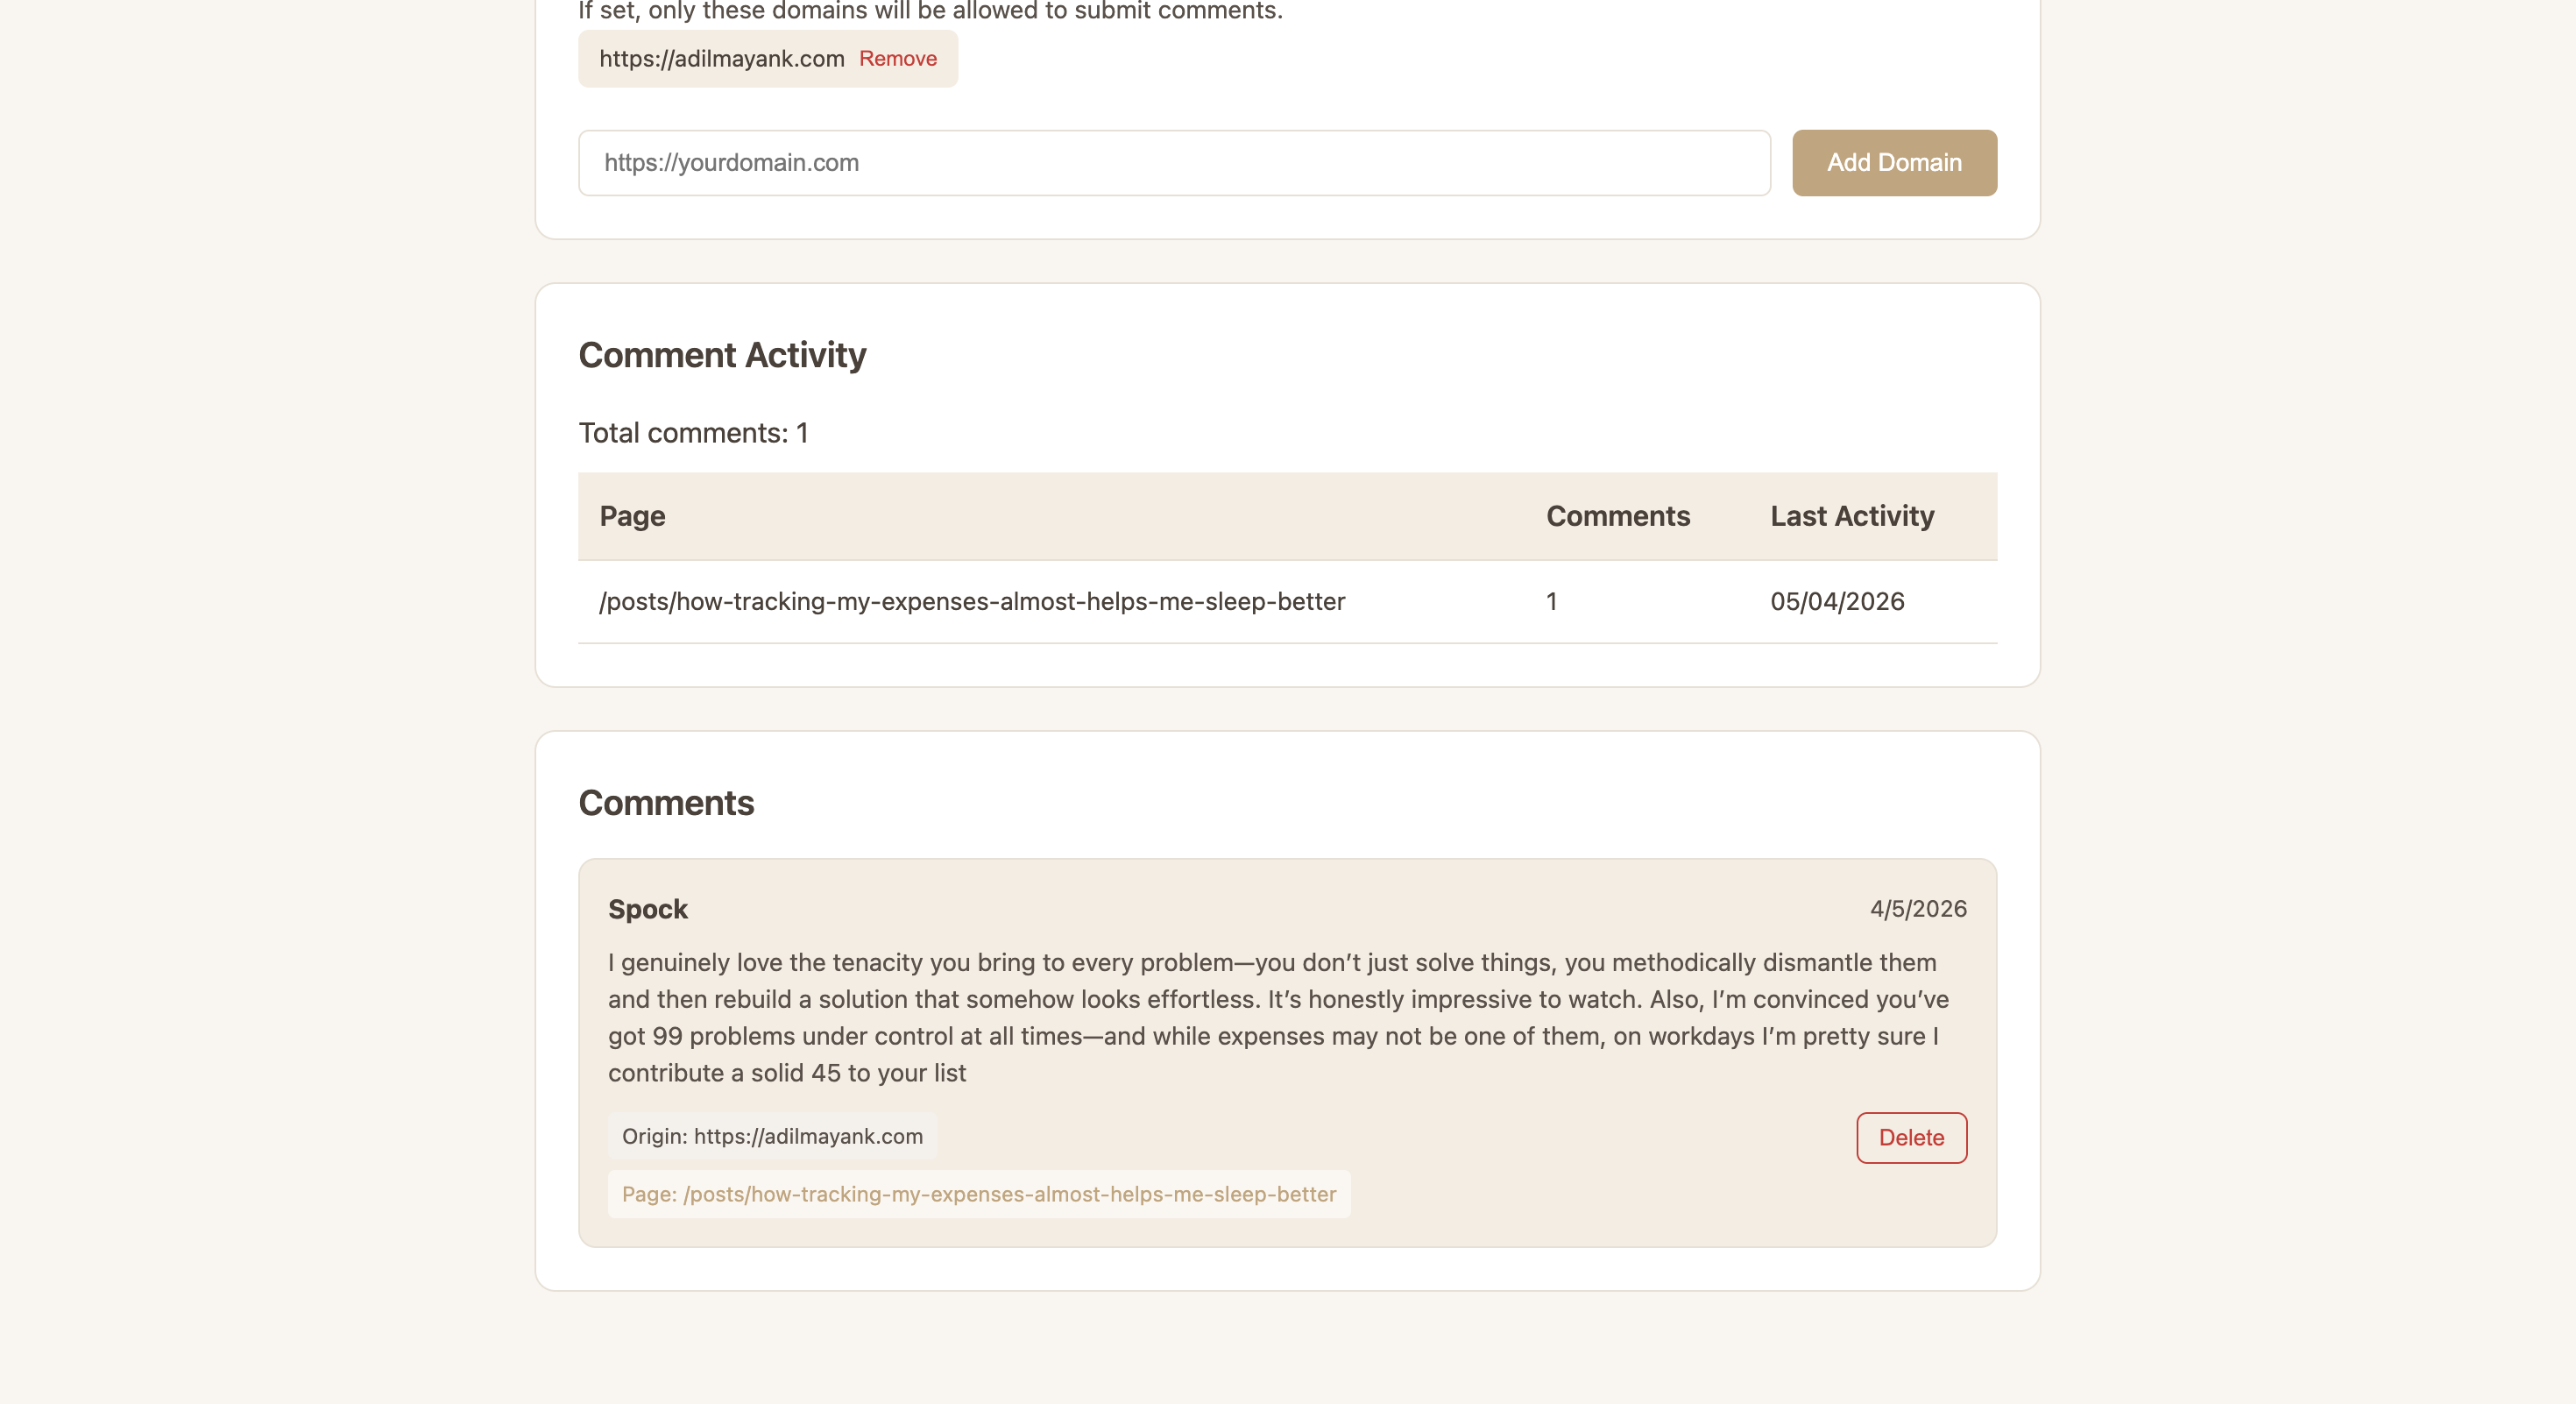
Step 5: Configure Settings (Optional)
From your dashboard, you can control how Talky works on your site.
Domain Restriction
Only allow comments from specific domains:
- Go to Settings in your dashboard
- Add allowed domains (e.g., myblog.com, myapp.io)
- Save changes
Setting up domain restrictions prevents others from using your API key on unauthorized websites.
Troubleshooting
Comments not showing?
- Make sure the API key is correct (no extra spaces)
- Verify the script tag is before the closing </body> tag
- Check browser console for errors (F12 → Console)
- Ensure your domain is added to allowed domains (if configured)
Getting "Invalid API Key" error?
- Copy your API key again from the dashboard
- Make sure you're using the live key (not test)
- Regenerate your key if needed
Comments not loading on mobile?
- Talky is responsive by default—try refreshing the page
- Clear your browser cache
Quick Reference
Embed Code Template
<div id="talky-slot">
  <script async defer src="https://talky.adilmayank.com/v1/talky.js" data-key="YOUR_KEY"></script>
</div>
Configuration Options
- data-key — Your unique API key (required)
Need Help?
Questions or issues? Reach out or check the About page for more info.